You can set up a new Microsoft 365 account for non-profits by signing up for a free trial of Microsoft Business Standard. The free trial is plenty of time to apply for non-profit discounts which give you 10 free Microsoft 365 Business Premium licenses and as many Microsoft 365 Business Basic accounts you need (up to 300 to be precise).
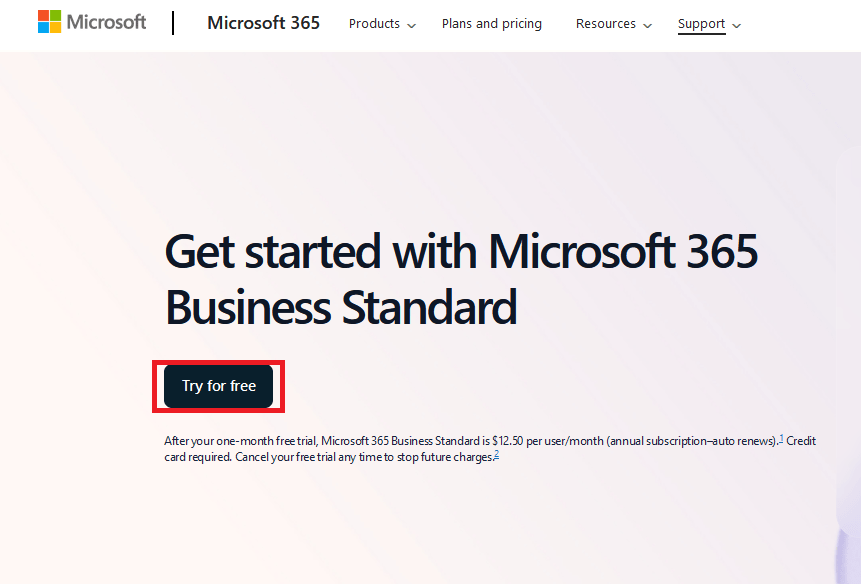
Step 1
Visit https://www.microsoft.com/en-us/microsoft-365/business/microsoft-365-business-standard-one-month-trial and click Try free for one month.
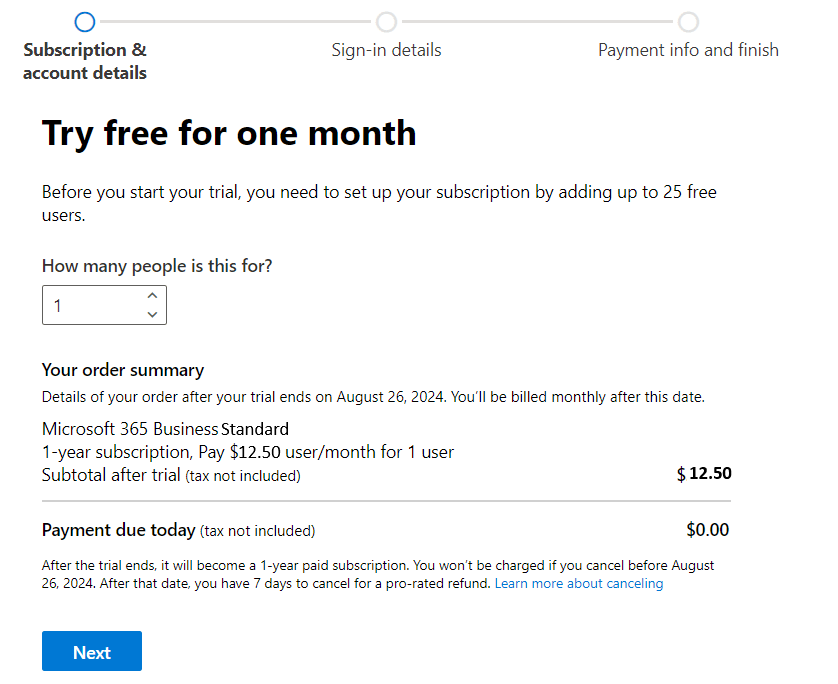
Step 2
Select the number of licenses you need and click Next
Step 3
Enter your organizational email address and click Next.

Step 4
If your organization doesn’t have Microsoft 365 yet, it will ask you to setup an account as shown below.

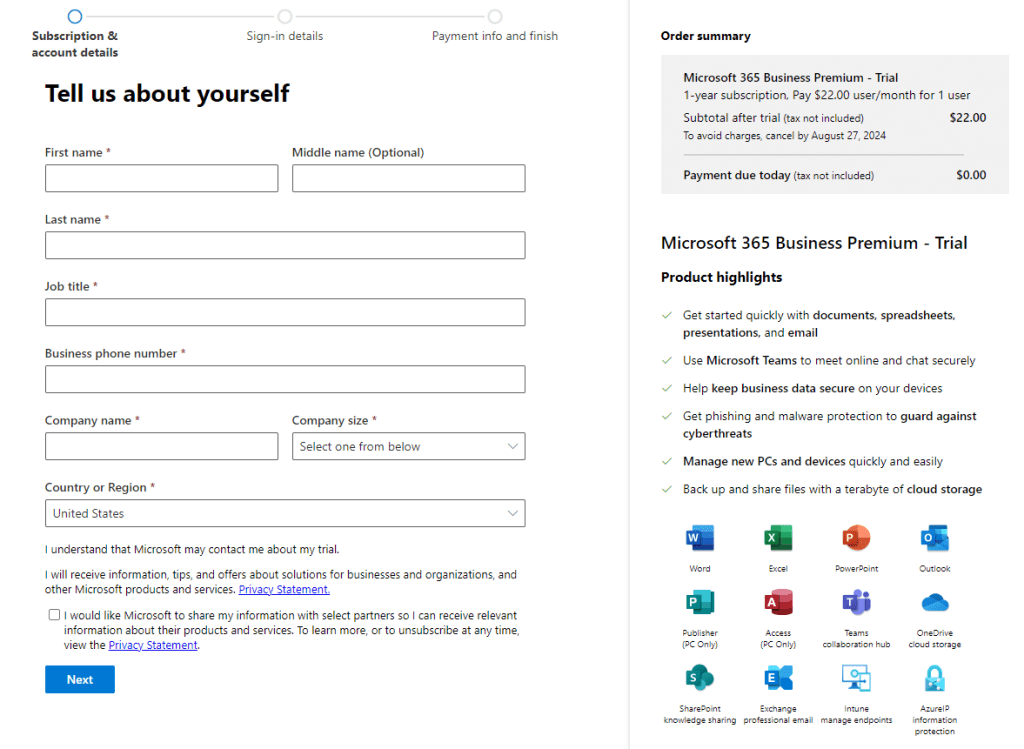
Step 5
Fill out the account details and complete the setup
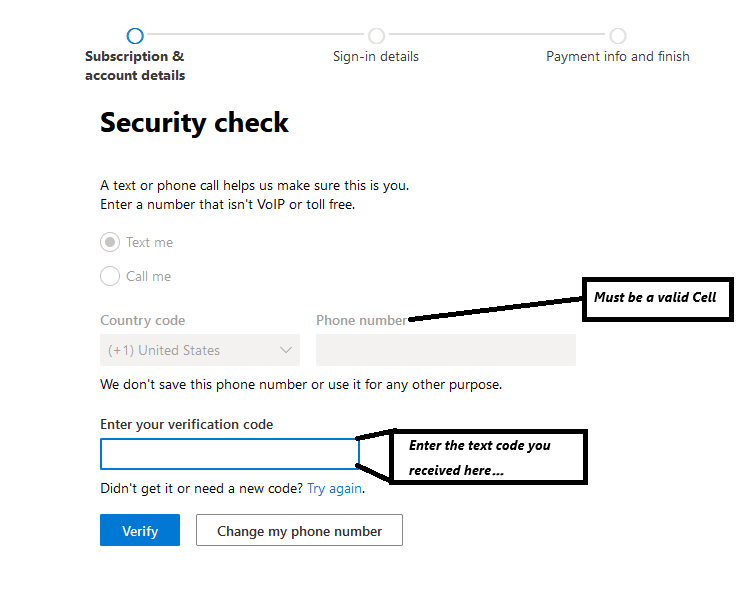
Step 6
Enter a valid cell phone number (it cannot be a Google Voice number) and click send code and then enter the text code to finish validating.
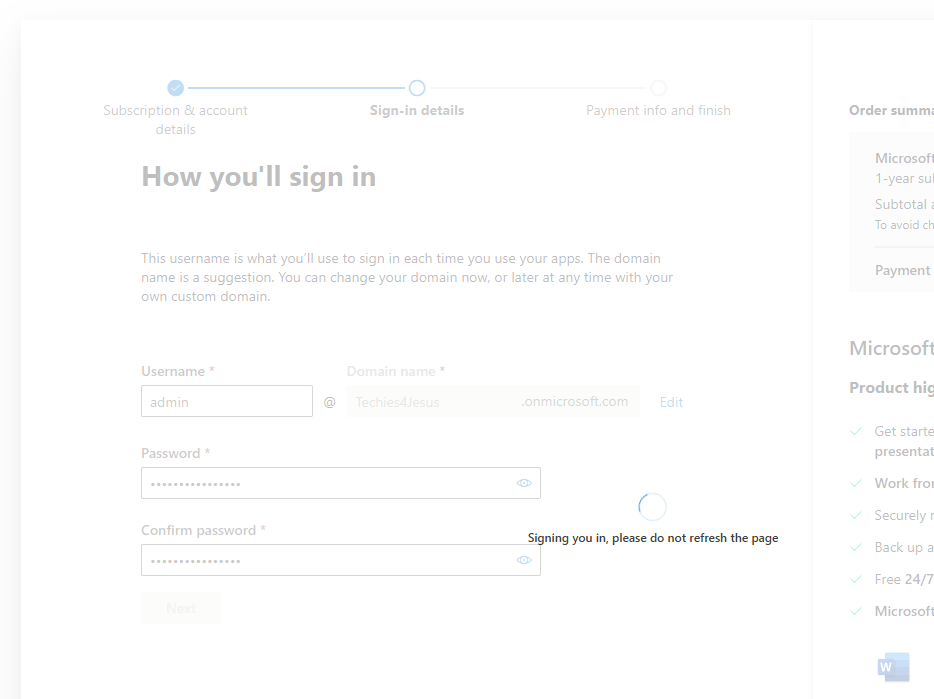
Step 7
Set your username and password and click next
Step 8
Enter your payment method and click Save

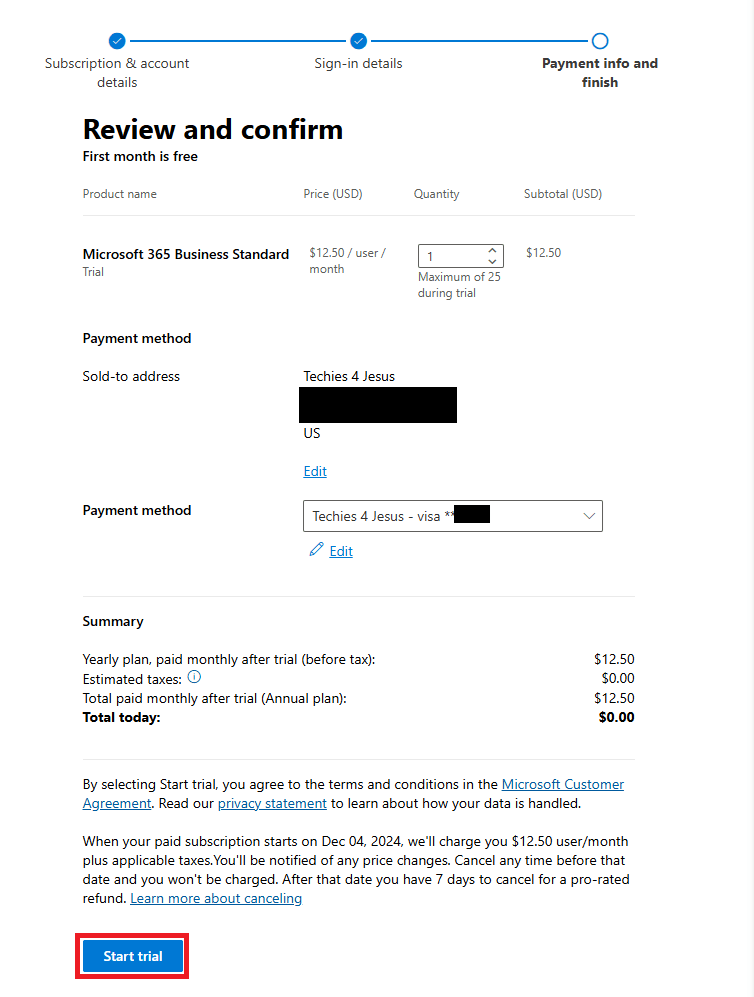
Step 9
Click Start Trial
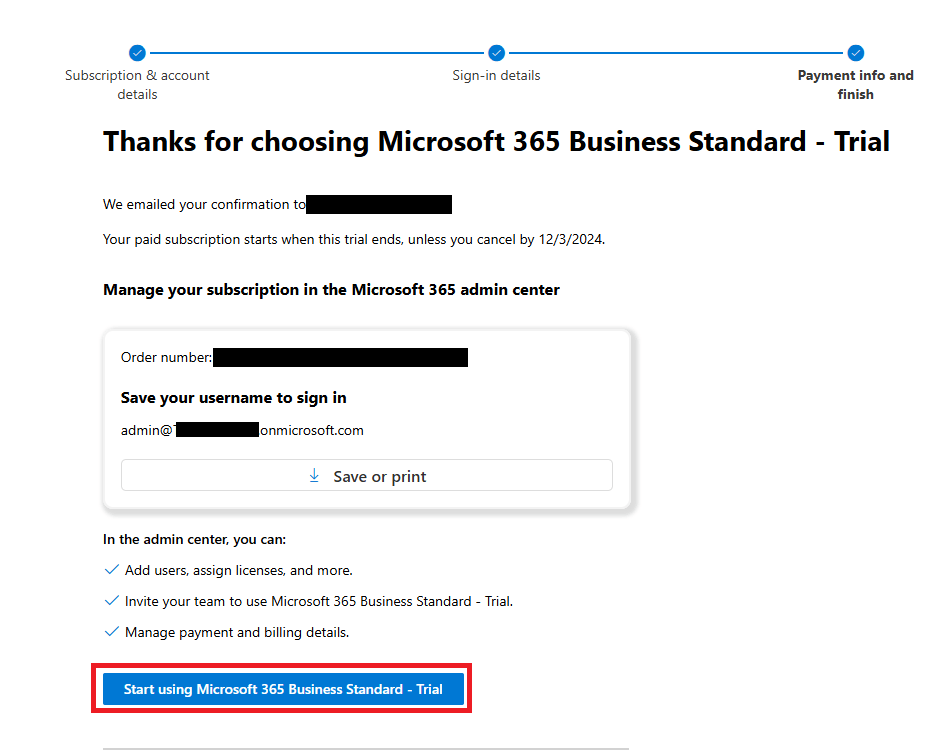
Step 10
Click Start Using Microsoft 365 Business Standard – Trial
Apply for Non-Profit Benefits with Microsoft
Step 1: Verify Eligibility
- Microsoft Nonprofit offers are available only to certain nonprofit organizations that meet specific eligibility criteria. To check if your organization is eligible, visit the Microsoft Nonprofit Eligibility page.
Step 2: Create a Microsoft Nonprofit Account
- Go to the Microsoft Nonprofit Portal and click on “Get Started.”

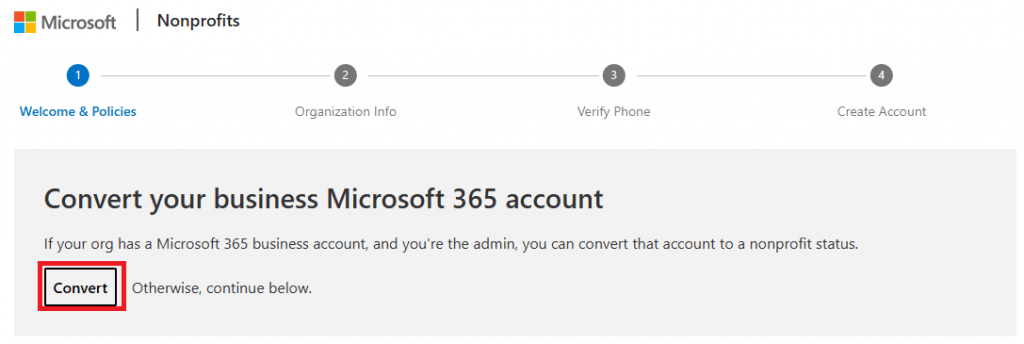
Step 3: Submit Eligibility Information
- Click Apply, then click Convert

Step 1
Step 2
Step 4: Sign in
- It will ask you to sign-in
- Once signed in with a Global Admin account, it will ask you to fill out your registration type (IRS) and your EIN number

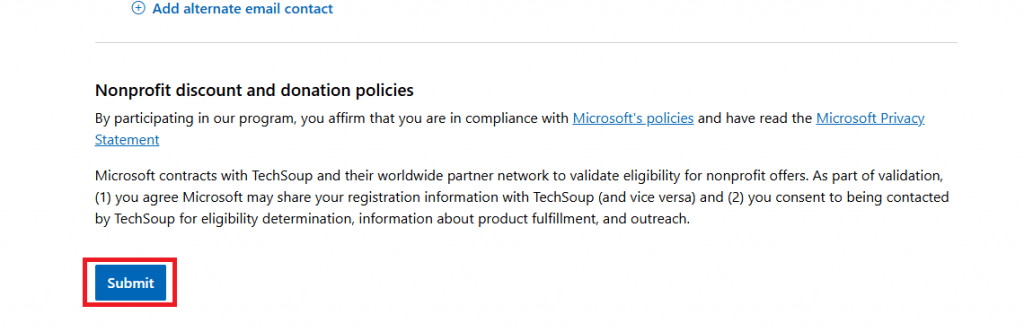
Step 5: Submit your Application
- Once you have filled out the Registration Type and IRS EIN Number, ensure all other information is correct and be sure to correct the first name and last name if you used a generic name for the global administrator account
- Then scroll down and click Submit
Step 6. Confirm the Transition
- You may be asked to scan a copy of your 501.c3 document and upload it for proof of non-profit status during the process.
- You may also be asked to confirm your website address, which will be used during the process to validate status.
Step 7: Purchase Nonprofit Licensing
- Once the conversion is complete, you will see the option to purchase non-profit services in the admin center
- Once logged into the admin center, click on Billing in the left navigation pane and click Purchase Services
- There are two specific licenses that you will want to purchase right away because they are free and those are
- Microsoft 365 Business Premium (Nonprofit Staff Pricing) Donation
- Microsoft 365 Business Basic (Nonprofit Staff Pricing)

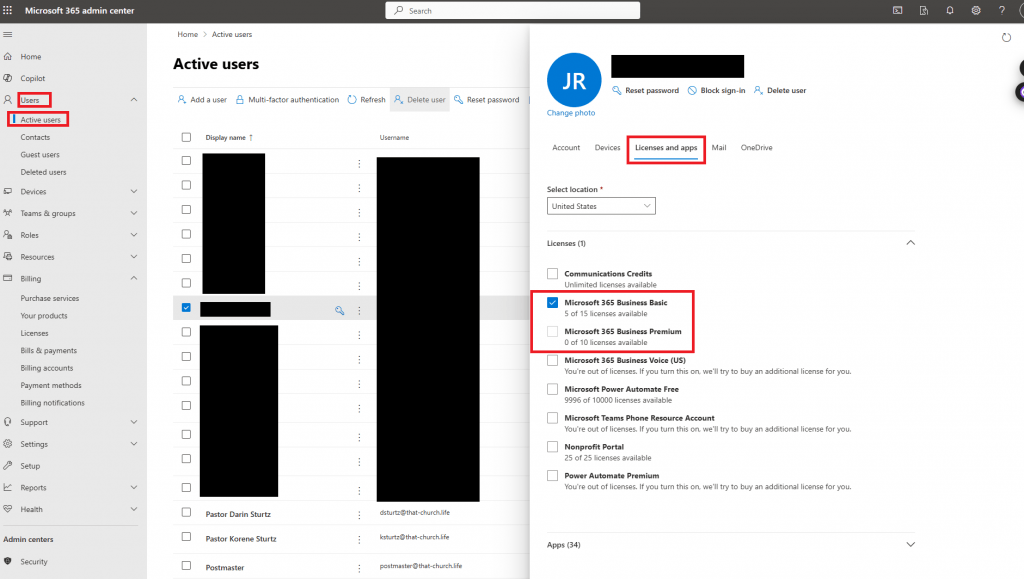
Step 8: Apply Licenses to Users
- Once you have finished purchasing the licenses you can apply them to users by going to Users > Active Users in the admin center left navigation pane
- For each user, click on them one by one, click the licenses and apps tab and uncheck their old license and check the new license (either the business basic or the business premium)
- Note that Business Basic only grants access to the online versions of Word, Excel, Outlook, PowerPoint, Etc… and Premium includes the desktop/mac versions of the apps
Find This Article Helpful?
Help keep our site free and donate today.